Showstopper Chocolate Cherry Ice Cream Tart: No Oven Required
Imagine a dessert that commands attention, elicits oohs and aahs, yet requires absolutely no baking whatsoever. Sounds like a dream, especially during the sweltering heat of summer, right? Enter the spectacular
chocolate covered cherry ice cream tart – a culinary marvel designed to impress without breaking a sweat in the kitchen. This isn't just any dessert; it's a showstopper, a conversation starter, and quite possibly the easiest impressive treat you'll ever assemble. Forget hours spent layering, baking, and frosting. This no-oven wonder delivers gourmet appeal with minimal effort, making it the ultimate summertime indulgence.
The Magic Behind the No-Bake Brownie Crust
Every great tart starts with a phenomenal crust, and our chocolate covered cherry ice cream tart is no exception. The foundation of this magnificent dessert is a simple yet decadent no-bake brownie crust that comes together in mere minutes. Unlike traditional baked crusts that demand precision and oven time, this version is forgiving and quick, allowing you to bypass the oven entirely.
To create this delightful base, you'll typically combine crushed chocolate cookies (like Oreos, with or without the cream filling, depending on your preference for sweetness) with melted butter and a touch of cocoa powder for an intensified brownie flavor. Some recipes might even call for a quick mix of cocoa, sugar, and butter with crushed graham crackers or digestive biscuits. The beauty is in its simplicity:
- Speed: It's ready in minutes, simply mix and press.
- Flavor: Rich, chocolatey, and provides the perfect counterpoint to the creamy ice cream.
- Texture: Firm enough to hold its shape, yet yielding and delicious with every bite.
For the best presentation, a tart pan with a removable bottom is your secret weapon. These pans not only lend that elegant, fluted edge to your tart, but they also make unmolding incredibly simple. A clever trick to ensure effortless removal is to line the tart pan with plastic wrap before pressing in your crust. This creates a sling that allows you to lift the entire tart out of the pan with ease, ready to be placed on a cake stand for that extra touch of drama. This simple step saves you from any potential breakage or sticking, ensuring your showstopper looks flawless from every angle. If you're looking for even more quick and easy dessert solutions, explore our
Quick & Easy Chocolate Cherry Ice Cream Tart for Busy Bakers article for more inspiration!
Crafting Your Own Divine Chocolate Cherry Ice Cream
While a high-quality store-bought chocolate cherry ice cream can certainly work wonders for this tart, there’s an undeniable magic in homemade. The idea of creamy, rich chocolate cherry ice cream studded with bits of sweet, roasted cherries is a dream come true for any dessert enthusiast. If you're willing to take a small extra step (still no-oven for the tart itself!), crafting your own roasted cherries will elevate this dessert to an unparalleled level.
Why Roast Cherries? Roasting cherries deepens their natural sweetness and concentrates their flavor, making them intensely fruity and almost jam-like. This process also slightly reduces their water content, which is beneficial in an ice cream tart as it helps prevent iciness.
Here's a simple guide to roasting cherries, inspired by time-tested methods:
- Preheat your oven to 425°F (220°C).
- Line a baking sheet with parchment paper for easy cleanup.
- Wash and carefully pit fresh sweet cherries (Bing or Rainier varieties are excellent choices).
- Slice the pitted cherries in half and spread them in a single layer across the prepared baking sheet.
- Roast for approximately 20 minutes, or until the cherries begin to soften and release their vibrant juices.
- Remove from the oven, and while still warm, sprinkle lightly with sugar. This helps coax out even more of their delicious juices and creates a syrupy reduction.
- Stir gently and then chill thoroughly before incorporating them into your ice cream or using them as a topping.
Once your roasted cherries are ready, you can either fold them into a batch of your favorite homemade chocolate ice cream or swirl them into a high-quality vanilla or plain chocolate ice cream base. For that "chocolate covered" element, consider stirring in mini chocolate chips or finely chopped dark chocolate into the ice cream along with the cherries. The interplay of sweet, tart, and rich chocolate makes this central component truly unforgettable.
Assembling Your Masterpiece: Tips for a Flawless Tart
With your irresistible brownie crust and decadent chocolate cherry ice cream components ready, the assembly of your showstopper is remarkably straightforward. This is where the magic truly happens, transforming simple ingredients into an elegant dessert that looks like it took hours.
Here’s a step-by-step approach to ensure your chocolate covered cherry ice cream tart comes together beautifully:
- Prepare the Crust: Firmly press your no-bake brownie crust mixture into the prepared tart pan (lined with plastic wrap!). Use the bottom of a glass or your knuckles to ensure it’s compact and even. Chill the crust in the freezer for at least 30 minutes to firm it up.
- Soften the Ice Cream: Take your chocolate cherry ice cream out of the freezer about 10-15 minutes before assembly to allow it to soften slightly. It should be pliable enough to scoop and spread, but not completely melted.
- Layer with Care: Spoon the softened ice cream into the chilled crust, spreading it evenly to fill the tart shell. Gently tap the tart pan on the counter a few times to release any air pockets and ensure a smooth, level surface.
- Add the "Covered" Element (Optional but Recommended): For a true "chocolate covered cherry" experience, you can add another layer of chocolate. This could be a drizzle of chocolate ganache over the ice cream before freezing, a sprinkling of chocolate shavings, or even finely chopped chocolate-covered cherries on top.
- Freeze Until Solid: This is the most crucial step for a no-bake ice cream tart. Cover the tart loosely with plastic wrap and freeze for at least 4-6 hours, or preferably overnight, until it is completely firm. This ensures clean slices and a stable structure.
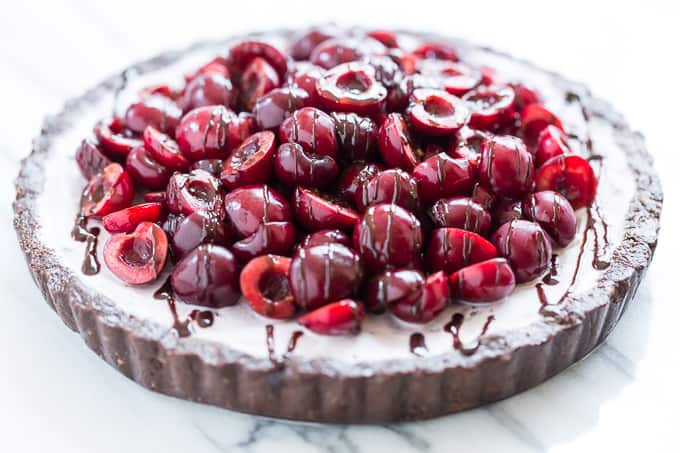
- Unmold and Garnish: Once fully frozen, gently lift the tart out of the pan using the plastic wrap sling. Peel off the plastic wrap. For a truly professional look, transfer it to a serving platter or cake stand. Garnish generously with fresh cherries, more chocolate shavings, a dollop of whipped cream, or a final elegant drizzle of chocolate sauce.
The result is a dessert that not only tastes incredible but also boasts an inviting presentation, perfect for any gathering.
Beyond the Cherry: Endless Flavor Possibilities
While the chocolate covered cherry ice cream tart is undeniably a classic and a fan favorite, the concept itself is incredibly versatile. This no-bake structure allows for infinite adaptability, opening up a world of flavor combinations to suit any craving or season. This is truly an easy summer treat that invites creativity!
Consider these tantalizing variations:
- Tropical Bliss: A coconut macaroon crust filled with mango or passion fruit ice cream, topped with fresh berries and toasted coconut flakes.
- Caramel Delight: A blondie-style no-bake crust (perhaps using crushed shortbread cookies and brown sugar) with salted caramel ice cream, topped with candied pecans and a generous caramel drizzle. The reference even hinted at this!
- Nutty Indulgence: A crushed peanut butter cookie crust, layered with peanut butter cup ice cream and chocolate fudge swirls, finished with chopped roasted peanuts.
- Berry Beautiful: A graham cracker crust supporting a luscious strawberry or raspberry swirl ice cream, adorned with an assortment of fresh seasonal berries and a hint of mint. For more ideas that are easy and delicious, check out our No-Bake Chocolate Cherry Ice Cream Tart: Easy Summer Treat article!
- Coffee Lover's Dream: A chocolate wafer crust, filled with rich coffee ice cream, dusted with cocoa powder and garnished with chocolate-covered espresso beans.
The beauty of this format is that you can mix and match your favorite crusts, ice cream flavors, and toppings to create a dessert that is uniquely yours. It’s an invitation to experiment and find your next favorite showstopper with minimal effort.
This chocolate covered cherry ice cream tart truly embodies the best of both worlds: gourmet appeal and effortless preparation. It’s the ideal solution for those moments when you need an impressive dessert without the fuss, especially when the weather calls for cool, refreshing treats. So go ahead, whip up this no-oven wonder, and prepare to delight your guests with a dessert that looks like it came straight from a patisserie, but tastes like pure, homemade love. Enjoy every decadent, frosty bite!